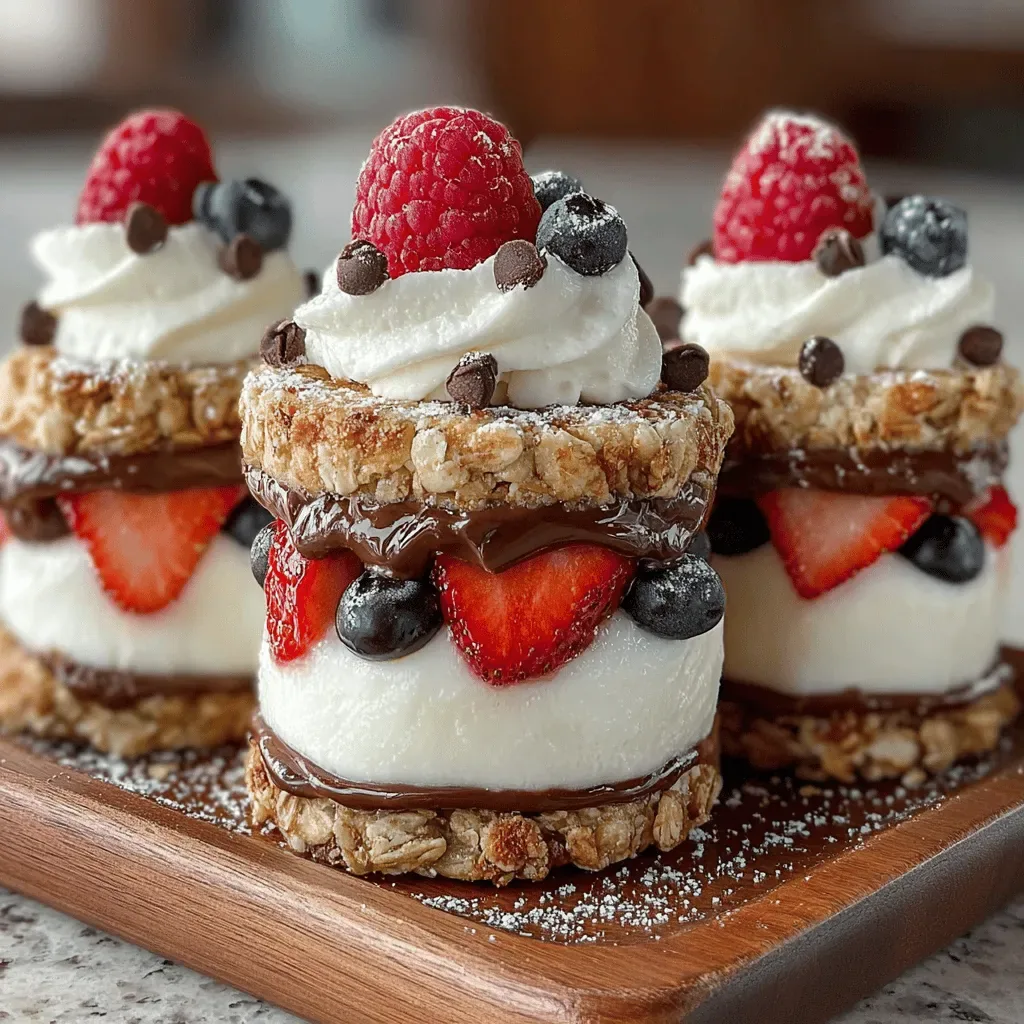
Imagine biting into a crisp chocolate cookie, feeling a cool swirl of tangy frozen yogurt melt on your tongue, and then being greeted by a burst of sweet‑tart berries—all in one handheld treat. This is the magic of Choco‑Berry Frozen Yogurt Sandwiches, a dessert that feels indulgent yet surprisingly light.
What sets this recipe apart is the balance of textures: crunchy chocolate wafers, silky frozen yogurt, and juicy berries, all tied together with a glossy chocolate drizzle. The flavors are layered, not overwhelmed, allowing each component to shine while supporting the others.
Kids, teens, and even the most health‑conscious adults will adore these mini‑sandwiches, making them perfect for birthday parties, backyard barbecues, or a refreshing after‑dinner surprise on a hot summer night.
The process is straightforward: bake the cookie bases, blend a simple frozen yogurt mixture, fold in fresh berries, assemble the sandwiches, and give them a quick freeze. In under an hour you’ll have a freezer‑ready dessert that looks as impressive as it tastes.
Why You'll Love This Recipe
Texture Harmony: The contrast between crunchy chocolate wafers, creamy frozen yogurt, and juicy berries creates a mouthfeel that keeps you reaching for more with every bite.
Quick Assembly: Each step is designed for speed—no complex techniques—so you can whip up a crowd‑pleasing dessert in under an hour, even on a busy weeknight.
Customizable Flavors: Swap berries, add a splash of citrus, or drizzle white chocolate; the base is flexible enough to accommodate endless flavor experiments.
Health‑Forward: Using low‑fat frozen yogurt and fresh fruit gives you a dessert that feels indulgent without the guilt of heavy cream or sugar‑laden ice cream.
Ingredients
The foundation of these sandwiches is a simple chocolate wafer that provides structure and a deep cocoa flavor. The frozen yogurt mixture is lightly sweetened and flavored with vanilla, allowing the berries to shine. Fresh berries add natural sweetness and a pop of color, while the chocolate drizzle ties everything together with a glossy finish. Optional toppings like toasted almonds or shredded coconut give an extra crunch for those who love a little texture variation.
Cookie Base
- 12 chocolate wafer cookies (approx. 2 inches square)
- 1 tablespoon melted dark chocolate (for brushing)
Frozen Yogurt Mix
- 2 cups plain low‑fat frozen yogurt
- 1 teaspoon pure vanilla extract
- 2 tablespoons honey or agave syrup
Berry Filling
- ½ cup fresh strawberries, hulled and sliced
- ¼ cup fresh blueberries
- ¼ cup fresh raspberries
- 1 tablespoon lemon juice (to brighten)
Chocolate Drizzle & Optional Toppings
- ¼ cup dark chocolate chips
- 1 teaspoon coconut oil (for smooth drizzle)
- 2 tablespoons toasted sliced almonds (optional)
- 1 tablespoon unsweetened shredded coconut (optional)
Together these ingredients create a dessert that feels both luxurious and wholesome. The chocolate wafers give a sturdy yet melt‑in‑your‑mouth base, while the frozen yogurt stays soft enough to bite through after a brief freeze. Fresh berries contribute natural sweetness and a pop of color, and the final chocolate drizzle adds a glossy, indulgent finish that makes each sandwich look bakery‑ready.
Step-by-Step Instructions
Preparing the Cookie Base
Line a baking sheet with parchment. Lightly brush each chocolate wafer with the melted dark chocolate to add a subtle shine and a hint of extra cocoa. Place the wafers flat on the sheet, spacing them evenly. Allow the chocolate coating to set for about 5 minutes at room temperature, or speed up the process by chilling them for 2 minutes in the freezer.
Making the Frozen Yogurt Mix
In a medium bowl, whisk together the frozen yogurt, vanilla extract, and honey until the mixture is smooth and glossy. If the yogurt is too firm, let it sit for 2‑3 minutes to soften, then whisk again. This ensures an even spread when layered between the cookies and prevents icy pockets.
Assembling the Sandwiches
- Layer Yogurt. Using a small offset spatula, spread a generous teaspoon of the yogurt mixture onto the flat side of each prepared wafer, leaving a thin border to avoid overflow.
- Add Berries. Top the yogurt layer with a mixture of strawberries, blueberries, and raspberries. The berries should be evenly distributed but not piled too high—about ¼ cup per sandwich works well.
- Close the Sandwich. Place a second chocolate wafer on top, gently pressing down so the yogurt and berries adhere without squashing the fruit.
- Freeze Quickly. Transfer the assembled sandwiches to a baking sheet lined with parchment and place them in the freezer for 15‑20 minutes. This firms the yogurt enough for handling while keeping the texture creamy.
Finishing Touches & Serving
While the sandwiches finish chilling, melt the dark chocolate chips with coconut oil in a microwave‑safe bowl (30‑second bursts, stirring in between) until smooth. Drizzle the glossy chocolate over each sandwich in a zig‑zag pattern, then immediately sprinkle optional toasted almonds or shredded coconut if desired. Return to the freezer for an additional 5 minutes to set the drizzle. Serve straight from the freezer for a refreshing bite, or let sit 2‑3 minutes at room temperature for a softer texture.
Tips & Tricks
Perfecting the Recipe
Use Fully Thawed Yogurt. Let the frozen yogurt sit at room temperature for 5‑7 minutes before mixing; this creates a smoother spread and prevents cracks in the sandwich.
Pat Berries Dry. After washing, gently pat berries with a paper towel. Excess moisture can make the yogurt soggy and affect the freezer texture.
Even Layer Thickness. Aim for a uniform ¼‑inch layer of yogurt; too thick creates a hard core, too thin leads to breakage.
Quick Freeze. A blast of cold (freezer set to -18 °C/0 °F) firms the sandwich fast, preserving the bright berry color.
Flavor Enhancements
Add a pinch of sea salt to the chocolate drizzle for a sweet‑salty contrast, or swirl in a teaspoon of orange zest into the yogurt mix for a citrusy lift. A drizzle of raspberry coulis over the finished sandwich adds an extra burst of fruit intensity.
Common Mistakes to Avoid
Never use warm berries—they release juice that can melt the yogurt layer. Also, avoid over‑freezing the sandwiches beyond 30 minutes; the chocolate drizzle may become brittle and the interior can turn icy rather than creamy.
Pro Tips
Pre‑Score the Chocolate. Lightly scoring the drizzle with a toothpick creates a decorative pattern that also helps the chocolate set evenly.
Freeze in a Single Layer. Place sandwiches on a tray without touching each other; this prevents them from sticking together and makes removal easier.
Use a Small Ice Cream Scoop. For consistent yogurt portions, a ½‑cup scoop ensures each sandwich receives the same amount, promoting even texture.
Finish with a Light Dusting. A quick sprinkle of powdered sugar just before serving adds visual appeal without overwhelming the flavors.
Variations
Ingredient Swaps
Swap chocolate wafers for almond or hazelnut cookies for a nutty twist. Replace mixed berries with tropical fruits like mango and pineapple for a summer vibe. Use Greek yogurt instead of frozen yogurt for extra protein, or switch to dairy‑free coconut yogurt for a vegan version.
Dietary Adjustments
For gluten‑free needs, choose certified gluten‑free chocolate cookies or make a homemade almond‑flour base. To keep it sugar‑free, replace honey with a zero‑calorie sweetener like erythritol and use unsweetened dark chocolate for the drizzle. Vegan eaters can substitute plant‑based frozen yogurt and use agave syrup.
Serving Suggestions
Serve these mini sandwiches on a chilled platter alongside fresh fruit skewers for a brunch buffet. Pair with a light sparkling water infused with citrus for a refreshing contrast. For a dessert bar, arrange them on a tiered stand and drizzle additional chocolate just before guests arrive.
Storage Info
Leftover Storage
Place any uneaten sandwiches in an airtight container or a zip‑top freezer bag. Keep them in the freezer for up to 3 weeks; the texture remains creamy as long as they’re sealed well. If you plan to eat them within 48 hours, you can store them in the refrigerator, but the yogurt will become softer.
Reheating Instructions
For a softer bite, let a sandwich sit at room temperature for 5‑7 minutes before serving. If you prefer a warm contrast, microwave a single sandwich on low power (30 %) for 15‑20 seconds, then finish with a fresh drizzle of melted chocolate. Avoid high heat, which can melt the cookie base.
Frequently Asked Questions
This Choco‑Berry Frozen Yogurt Sandwich recipe delivers a perfect blend of crunch, creaminess, and fruit‑forward brightness, all while staying light enough for any occasion. You now have the full roadmap—from ingredient selection to storage—so you can recreate these treats with confidence. Feel free to experiment with swaps, toppings, or seasonal fruits; the core technique stays the same, and the results are always delightful. Enjoy every bite of your cool, chocolate‑kissed masterpiece!


