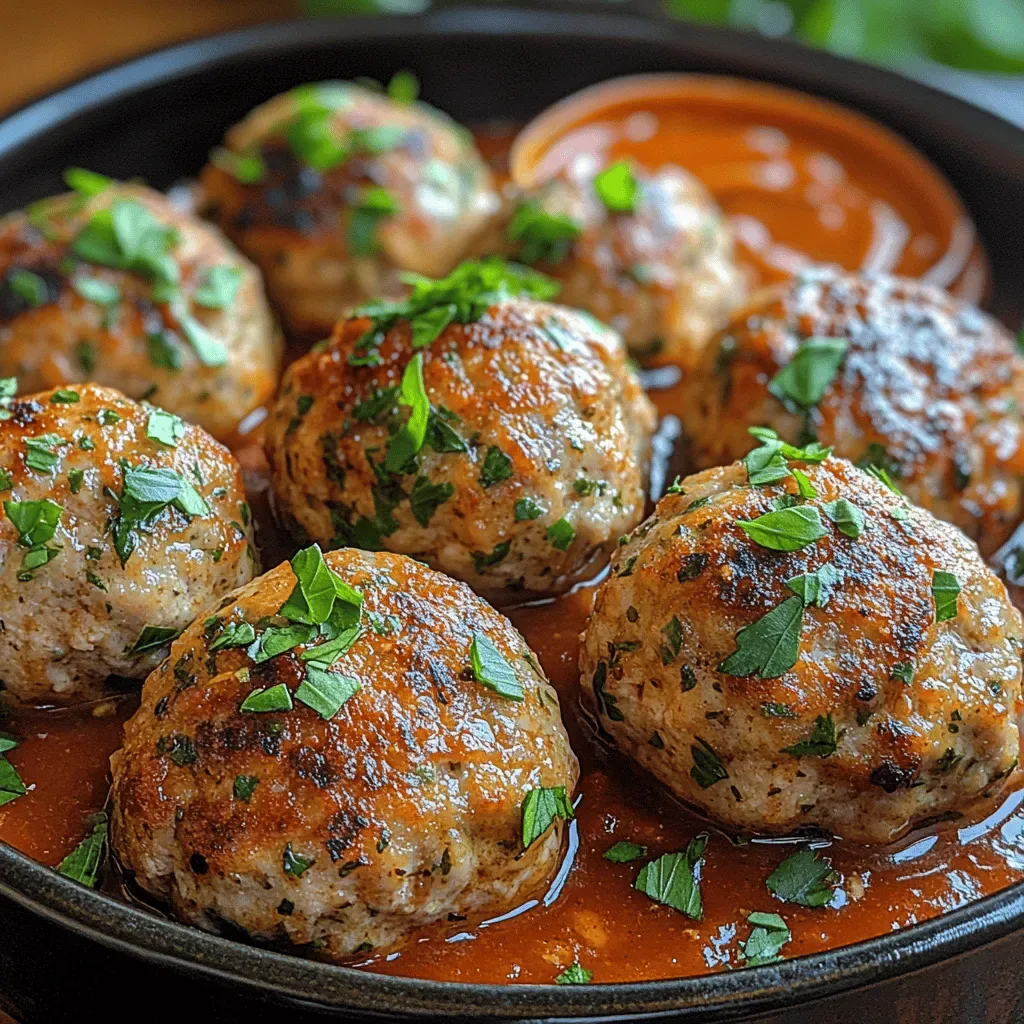
Imagine tiny, juicy orbs of chicken bursting with aromatic herbs and a gentle garlic kiss—this is the magic of Garlic Herb Chicken Meatballs. Each bite delivers a balance of savory depth and bright freshness that feels both comforting and sophisticated.
What makes this dish truly special is the marriage of lean ground chicken with a fragrant blend of parsley, thyme, and rosemary, all lifted by a subtle hint of lemon zest. The light honey‑garlic glaze adds a glossy finish without overwhelming the natural flavors.
Family members who crave wholesome comfort food, busy professionals seeking a quick weeknight dinner, and even guests at casual gatherings will adore these meatballs. They shine on a simple pasta plate, atop a crisp salad, or as a protein‑packed snack.
The process is straightforward: combine the meat with herbs, shape into balls, give them a quick sear, then finish in the oven while the glaze caramelizes. In under an hour you’ll have a restaurant‑quality dish ready to serve.
Why You'll Love This Recipe
Bright Herb Symphony: Fresh parsley, thyme, and rosemary infuse the meat with a garden‑fresh aroma that lifts the whole dish, making every bite feel lively and clean.
Lean Protein Power: Ground chicken provides a low‑fat, high‑protein base, perfect for health‑conscious eaters who still want indulgent flavor without the guilt.
One‑Pan Simplicity: After the meatballs are browned, the sauce finishes in the same pan, reducing cleanup and allowing the browned bits to enrich the glaze.
Versatile Serving: These meatballs adapt to pasta, grain bowls, salads, or even as a party appetizer, giving you endless plating possibilities.
Ingredients
The foundation of this recipe is high‑quality ground chicken, which stays tender when combined with a generous handful of fresh herbs. Garlic and lemon zest add brightness, while a touch of honey balances the savory notes. The glaze, built from olive oil, chicken broth, and a splash of white wine, creates a silky coating that clings to each meatball, delivering flavor in every bite.
Main Ingredients
- 1 ½ lb ground chicken
- ½ cup breadcrumbs (whole‑wheat preferred)
- 1 large egg, lightly beaten
Herb Mixture
- ¼ cup fresh parsley, finely chopped
- 2 tsp fresh thyme leaves
- 1 tsp fresh rosemary, minced
- 1 tsp lemon zest
Glaze & Sauce
- 2 tbsp olive oil
- 3 cloves garlic, minced
- ¼ cup low‑sodium chicken broth
- ¼ cup dry white wine (or extra broth)
- 1 tbsp honey
Seasonings & Finishing
- ½ tsp sea salt
- ¼ tsp freshly ground black pepper
- Pinch red‑pepper flakes (optional)
Together these ingredients create a harmonious balance: the breadcrumbs keep the meatballs tender, the egg binds everything, and the herb trio injects aromatic freshness. The glaze’s honey‑garlic base caramelizes during baking, giving each bite a glossy, slightly sweet crust while the broth and wine keep the interior moist. A final sprinkle of pepper flakes adds a gentle heat that awakens the palate.
Step-by-Step Instructions
Preparing the Meatball Mixture
In a large bowl, combine the ground chicken, breadcrumbs, and beaten egg. Sprinkle the sea salt and black pepper over the mixture, then fold in the chopped parsley, thyme, rosemary, lemon zest, and minced garlic. Using your hands, gently mix until everything is just incorporated—over‑mixing can make the meatballs dense. Let the mixture rest for 5 minutes; this allows the breadcrumbs to absorb moisture, ensuring a tender bite.
Shaping & Browning
With wet hands, roll the mixture into uniform 1‑inch balls (about 20‑22 total). Heat a large oven‑safe skillet over medium‑high heat and add the olive oil. Once the oil shimmers, add the meatballs in a single layer, making sure not to crowd the pan. Let them sear undisturbed for 2‑3 minutes until a golden crust forms, then turn to brown the other side for another 2 minutes. This step builds flavor through the Maillard reaction.
Baking & Finishing the Glaze
- Deglaze the Pan. Reduce heat to medium and pour in the white wine (or extra broth). Scrape the browned bits from the bottom with a wooden spoon—these are flavor gold. Let the liquid reduce by half, about 2 minutes.
- Add Broth and Honey. Stir in the chicken broth and honey, mixing until the honey dissolves completely. The sauce should bubble gently; this signals that the sugars are beginning to caramelize.
- Combine Meatballs and Sauce. Return the browned meatballs to the skillet, turning them to coat evenly. Transfer the entire pan to a preheated oven at 375°F (190°C) and bake for 12‑15 minutes, or until the internal temperature reaches 165°F (74°C). The sauce will thicken and cling to each ball.
- Finish with Heat. Remove the pan from the oven. If you love a glossy finish, stir in a pinch of red‑pepper flakes and let the residual heat melt them into the glaze. Taste and adjust salt or pepper if needed.
Serving the Dish
Transfer the meatballs to a serving platter, spoon any remaining glaze over the top, and garnish with a sprinkling of fresh parsley. Serve immediately with your choice of side—steamed rice, zucchini noodles, or a crisp green salad all work beautifully. The meatballs stay moist for up to an hour if covered loosely with foil, making them perfect for family-style meals.
Tips & Tricks
Perfecting the Recipe
Chill the Mixture. After mixing, refrigerate the meatball blend for 15‑20 minutes. A colder mixture holds its shape better when forming and searing.
Use a Light Touch. Handle the mixture gently; over‑working creates dense meatballs. A quick roll is all that’s needed.
Even Sizing. Use a small ice‑cream scoop or a tablespoon to ensure uniform size, guaranteeing consistent cooking.
Preheat the Oven. A hot oven finishes the meatballs quickly, preserving juiciness while the glaze caramelizes.
Flavor Enhancements
Add a splash of fresh lemon juice right before serving for a bright pop. Stir in a tablespoon of grated Parmesan into the glaze for umami depth, or finish with a drizzle of extra‑virgin olive oil for silkiness.
Common Mistakes to Avoid
Skipping the resting period after baking lets juices escape, resulting in dry meatballs. Also, avoid turning the heat up too high during searing; burnt garlic will impart bitterness and mask the herb flavors.
Pro Tips
Fresh Herbs Over Dried. Fresh parsley, thyme, and rosemary give a brighter, more nuanced flavor than their dried counterparts.
Thermometer Accuracy. Insert a probe into the center of a meatball; 165°F (74°C) guarantees safety without overcooking.
Finish with Butter. A teaspoon of cold butter whisked into the hot glaze at the end adds a velvety sheen.
Batch Cook. If feeding a crowd, bake meatballs on two sheets simultaneously, rotating halfway through for even browning.
Variations
Ingredient Swaps
Replace ground chicken with ground turkey for a slightly richer texture, or use ground pork for a deeper flavor. For a plant‑based twist, try firm tofu crumbled and pressed, mixed with the same herbs. Swap white wine for apple cider vinegar for a tangier glaze, and use maple syrup instead of honey for a different sweetness profile.
Dietary Adjustments
For gluten‑free meals, use almond‑flour breadcrumbs or certified gluten‑free panko. To make the dish dairy‑free, keep the recipe as written—no dairy is required. For keto enthusiasts, replace breadcrumbs with crushed pork rinds and use a sugar‑free sweetener such as erythritol in place of honey.
Serving Suggestions
Pair the meatballs with cauliflower rice and a drizzle of the same glaze for a low‑carb bowl. Serve over whole‑grain couscous with roasted cherry tomatoes for Mediterranean flair. For a casual gathering, skewer the meatballs and offer a side of tzatziki or garlic aioli for dipping.
Storage Info
Leftover Storage
Allow the meatballs to cool to room temperature, then transfer them to an airtight container. In the refrigerator they stay fresh for 3‑4 days. For longer keeping, portion into freezer‑safe bags, lay flat to freeze, and store up to 3 months. Adding a thin layer of the glaze before sealing helps preserve moisture.
Reheating Instructions
Reheat in a 350°F (175°C) oven, covered with foil, for 12‑15 minutes until heated through. This method restores the glaze’s shine without drying the meat. Alternatively, microwave individual meatballs on medium power for 1‑2 minutes, adding a splash of broth to keep them moist, and stir the sauce before serving.
Frequently Asked Questions
Garlic Herb Chicken Meatballs bring together bright herbs, lean protein, and a glossy honey‑garlic glaze in a simple, one‑pan method. By following the detailed steps, storage tips, and variations above, you’ll master a dish that’s both wholesome and crowd‑pleasing. Feel free to experiment with swaps and sides to make it truly your own. Enjoy the burst of flavor and the satisfaction of a homemade masterpiece!


