It was a chilly Saturday evening, the kind where the wind whistles through the eaves and the kitchen becomes a sanctuary of warmth. I was rummaging through the fridge, eyes scanning for a way to rescue the leftover mashed potatoes that had been lounging there since Sunday dinner. The moment I lifted the lid, a cloud of buttery steam rose, carrying whispers of butter, cream, and a faint hint of garlic that had been coaxed into the mash earlier in the week. I thought, “What if I could transform these humble leftovers into something golden, crispy, and utterly addictive?” That spark of curiosity set the stage for what would become a beloved family tradition.
I grabbed a handful of shredded cheddar, a sprinkle of Parmesan, and a few green onions that were begging to be used before they wilted. As I mixed everything together, the kitchen filled with the nutty aroma of cheese melting into the potatoes, a scent that made my mouth water before the first bite even existed. The mixture felt velvety yet sturdy, begging to be shaped into bite‑size clouds that would later crack open with a satisfying crunch. Have you ever wondered why a simple mash can become a show‑stopping appetizer with just a few tweaks? The secret lies in the balance of textures and the clever use of pantry staples.
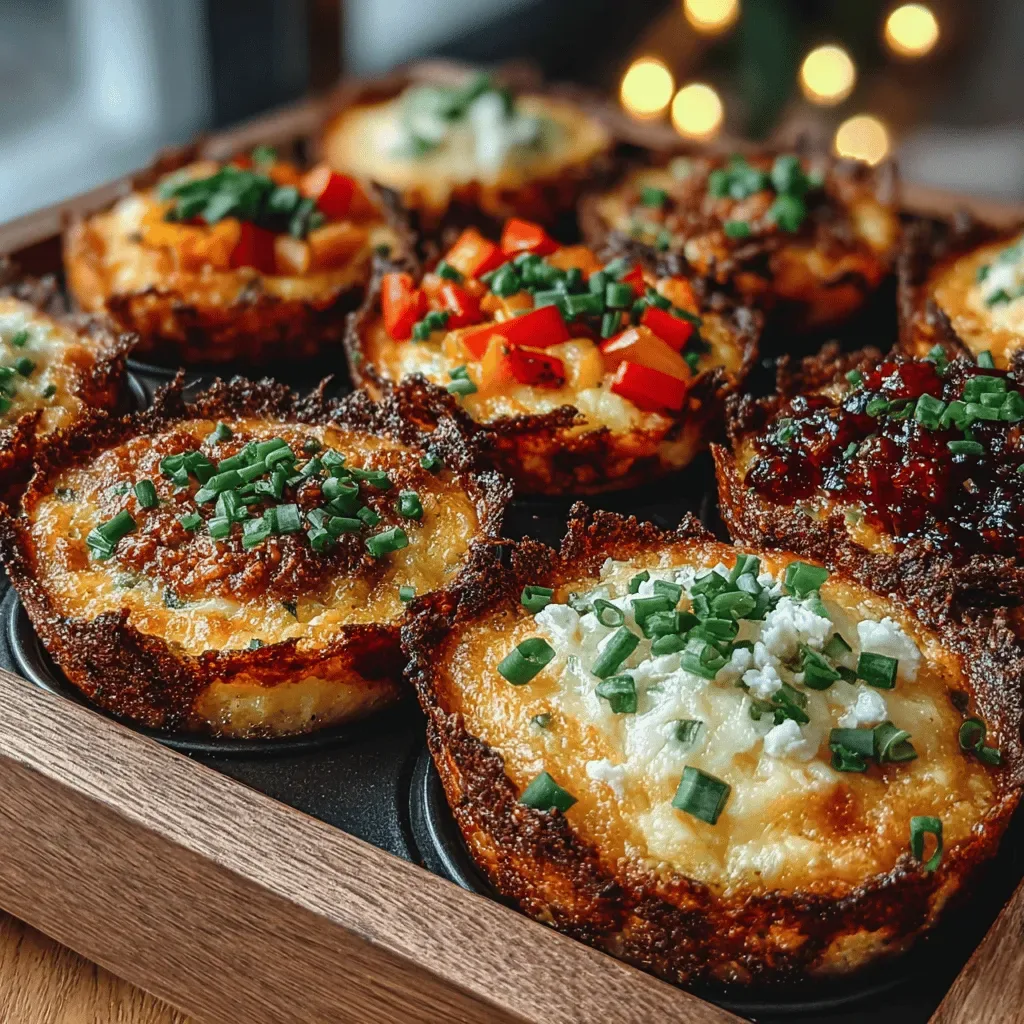
I remember the first time I fried these puffs: the sizzle sounded like a tiny fireworks display, and the golden edges glistened like sunrise on a calm lake. As I lifted the first puff from the pan, the crust sang a crisp, buttery note while the interior remained soft, cheesy, and comforting—like a warm hug for your taste buds. The reaction from my family was immediate; they were reaching for seconds before the first round was even finished. That moment taught me that the simplest transformations often create the most memorable meals, and it sparked a desire to perfect the technique so anyone could replicate it at home.
Now, I’m excited to share this recipe with you, because I truly believe that turning leftovers into a crowd‑pleasing snack is a culinary superpower anyone can master. I’ve gathered all the tips, tricks, and little secrets that turned my kitchen experiment into a repeat‑offered favorite. Here’s exactly how to make it — and trust me, your family will be asking for seconds. But wait, there’s a secret technique in step 4 that will give you an extra‑crisp exterior you never thought possible; stay tuned!
🌟 Why This Recipe Works
- Flavor Depth: Combining cheddar and Parmesan layers sharp, salty notes over the mellow, buttery base of the mashed potatoes, creating a complex palate that feels both familiar and exciting.
- Texture Contrast: The flour‑egg binder forms a delicate crust when fried, while the interior stays luxuriously soft, delivering that coveted “crunch‑then‑cloud” sensation in every bite.
- Ease of Execution: Most of the work happens before you even turn on the stove—mixing the ingredients, shaping the puffs, and letting them rest—so the actual cooking is quick and stress‑free.
- Time Efficiency: With a prep time of just 15 minutes and a cooking window of 30 minutes, this dish fits perfectly into a weeknight schedule without sacrificing flavor.
- Versatility: The base can be tweaked with herbs, spices, or even different cheeses, making it adaptable for brunch, game‑day snacks, or a sophisticated appetizer for guests.
- Ingredient Quality: Using leftover mashed potatoes means you’re already working with a well‑seasoned base, and the addition of fresh green onions adds a bright, aromatic lift.
- Nutrition Boost: While indulgent, the recipe still offers protein from cheese and egg, and you can control the amount of oil used for frying, keeping it relatively balanced.
- Crowd‑Pleasing Factor: The golden exterior and cheesy interior are universally loved, making it a safe bet for picky eaters and food enthusiasts alike.
🥗 Ingredients Breakdown
The Foundation: Mashed Potatoes & Flour
The leftover mashed potatoes are the heart of this dish. Their creamy texture provides a perfect canvas for the cheese and seasonings, while the starches help bind everything together. If your mash is a little runny, consider draining excess liquid or adding a touch more flour to achieve a firmer consistency. All‑purpose flour acts as the structural backbone, creating a light crust that turns golden when fried. You can swap in gluten‑free flour if you have dietary restrictions, but be aware that the texture might be slightly denser.
Aromatics & Spices: Green Onions, Garlic & Onion Powder
Chopped green onions or chives introduce a fresh, mildly oniony bite that brightens the richness of the cheese. I love using chives because they add a subtle hint of garlic without overwhelming the palate. Garlic powder and onion powder amplify the savory depth, ensuring each puff has a well‑rounded flavor profile. If you’re feeling adventurous, a pinch of smoked paprika can add a gentle smoky undertone that pairs beautifully with cheddar.
The Secret Weapons: Cheddar & Parmesan
Shredded cheddar cheese is the star here, delivering that familiar melt‑in‑your‑mouth quality and a sharp, tangy flavor that cuts through the buttery potatoes. The grated Parmesan contributes a nutty, umami richness that elevates the overall taste and helps the crust brown evenly. For a twist, try using smoked gouda or pepper jack for a different flavor dimension, but keep the balance so the cheese doesn’t dominate the potato base.
Finishing Touches: Egg, Salt, Pepper & Oil
A single large egg acts as the glue that holds all components together, ensuring the puffs stay intact during frying. Season generously with salt and black pepper to taste; remember that the cheeses already bring saltiness, so a light hand is often best. Finally, a neutral oil—such as canola, vegetable, or grapeseed—provides a clean, high‑smoke‑point medium for achieving that perfect, even crunch without imparting any additional flavors.
With your ingredients prepped and ready, let's get cooking. Here's where the fun really begins…

🍳 Step-by-Step Instructions
-
Gather all your ingredients and place them in separate bowls so everything is within arm’s reach. This mise en place approach saves you from scrambling mid‑process and lets you focus on the tactile joy of shaping each puff. As you set out the cheese, notice how it clings together—this is a good sign that it will melt beautifully later. Trust me, this preparation step is the foundation of a smooth cooking experience.
-
In a large mixing bowl, combine the 2 cups of leftover mashed potatoes with ¼ cup of all‑purpose flour and the large egg. Stir gently until the mixture is uniform, being careful not to over‑mix, which could make the puffs tough. The batter should feel slightly sticky but manageable; if it feels too wet, sprinkle in an extra tablespoon of flour. This is the moment where the texture of the base is set, so pay close attention.
💡 Pro Tip: Let the mixture rest for 5 minutes after adding the flour; this allows the flour to hydrate fully, resulting in a lighter crust. -
Fold in the 1 cup shredded cheddar cheese, ¼ cup grated Parmesan cheese, 2 tablespoon chopped green onions or chives, ½ teaspoon garlic powder, and ½ teaspoon onion powder. Sprinkle a pinch of salt and black pepper to taste. The mixture will become speckled with golden cheese bits and green flecks, releasing a faint, inviting aroma as you stir. This step is where the flavor layers start to build, and the cheese begins to melt into the potatoes.
-
Shape the mixture into bite‑size balls, about the size of a walnut, using a lightly floured spoon or your hands. Place each ball onto a parchment‑lined tray, spacing them a few centimeters apart. Here’s the thing: if the balls are too large, they’ll struggle to crisp evenly; too small, and you’ll lose that satisfying interior. Once shaped, gently flatten each ball slightly to create a disc that will fry more uniformly.
⚠️ Common Mistake: Overcrowding the pan causes steam to trap, leading to soggy puffs instead of a crisp crust. -
Heat a generous layer (about ¼ inch) of neutral oil in a deep skillet over medium‑high heat. The oil is ready when a tiny breadcrumb sizzles and turns golden within 30 seconds. Carefully place a few puffs into the oil, making sure not to crowd the pan. As they hit the oil, you’ll hear a lively sizzle—listen for that sound; it’s the first sign of a crisp exterior forming.
-
Fry the puffs for 2‑3 minutes on each side, or until they turn a deep golden‑brown and release a fragrant, cheesy aroma. Use a slotted spoon to turn them gently, allowing each side to develop that coveted crunch. When the edges start to curl and the surface looks glossy, you know they’re ready. Transfer the cooked puffs to a paper‑towel‑lined plate to absorb excess oil.
💡 Pro Tip: Sprinkle a pinch of extra Parmesan onto the puffs while they’re still hot; it will melt instantly, adding an extra layer of flavor. -
While the first batch rests, repeat the frying process with the remaining puffs, maintaining the oil temperature so each batch cooks evenly. Consistency is key—if the oil cools too much, the puffs will absorb more oil and become greasy. Keep a close eye on the color; a slightly darker hue indicates a perfect caramelization without burning.
-
Serve the puffs hot, arranged on a platter with a side of cool sour cream or a tangy aioli for dipping. The contrast of hot, crispy bites with a cool, creamy dip creates a symphony of textures that will have everyone reaching for more. Go ahead, take a taste — you’ll know exactly when it’s right. And the result? A snack that’s both comforting and exciting, perfect for any gathering.
And there you have it! But before you dig in, let me share some tips that will take this from great to absolutely unforgettable…
🔐 Expert Tips for Perfect Results
The Taste Test Trick
Before you form the final puffs, scoop a tiny spoonful of the raw mixture and fry it in a mini pan. This quick test reveals whether the seasoning needs a little extra salt or pepper, and you can adjust accordingly. I once discovered my mash was a tad bland this way, and a pinch of extra cheese saved the day. Trust me on this one: a small taste early prevents a big disappointment later.
Why Resting Time Matters More Than You Think
After mixing, let the dough rest for at least 5 minutes. This short pause allows the flour to fully hydrate, creating a lighter, more cohesive crust. I once skipped this step and ended up with puffs that crumbled in the pan; the lesson? Patience at this stage is a game‑changer. The best part? The rest time is perfect for you to preheat the oil and set the table.
The Seasoning Secret Pros Won’t Tell You
Add a dash of smoked paprika or a pinch of cayenne to the mixture for a subtle heat that awakens the palate without overwhelming the cheese. This hidden layer of flavor is something I learned from a professional chef during a cooking class, and it instantly lifted the dish. The secret is to keep the spice subtle; you want the cheese to remain the star.
Oil Temperature Mastery
Maintain the oil temperature between 350°F and 375°F (175°C‑190°C). If the oil is too cool, the puffs absorb excess oil; too hot, and they burn before the interior heats through. Use a kitchen thermometer or the breadcrumb test mentioned earlier to gauge the heat. This tip ensures each puff is uniformly golden and never greasy.
Crispiness Boost with Double Dredge
After shaping the puffs, give them a quick dusting of flour, dip them back into the beaten egg, and roll them in flour once more. This double‑dredge creates a micro‑crust that locks in moisture while staying extra crunchy. I tried this once for a party, and the guests could hear the crackle as they bit into each puff—pure satisfaction.
🌈 Delicious Variations to Try
One of my favorite things about this recipe is how versatile it is. Here are some twists I've tried and loved:
Spicy Jalapeño Kick
Finely dice a jalapeño and fold it into the mixture along with a pinch of chili powder. The heat pairs beautifully with the creamy cheddar, giving each bite a surprising zing that’s perfect for game night.
Herb‑Infused Garden Fresh
Swap the green onions for a blend of fresh rosemary, thyme, and parsley. These herbs add an earthy aroma that transforms the puffs into a sophisticated appetizer suitable for a dinner party.
Smoky Bacon & Cheddar
Crumble cooked bacon into the mixture and replace half of the cheddar with smoked gouda. The smoky, salty notes create a decadent flavor profile that feels indulgent yet familiar.
Sweet & Savory Apple Cheddar
Add a tablespoon of finely diced apple and a splash of maple syrup to the batter. The subtle sweetness balances the sharp cheddar, making these puffs a delightful surprise for brunch.
Vegan Friendly Version
Replace the cheese with a blend of nutritional yeast and vegan cheddar shreds, use a flax‑egg (1 tbsp ground flaxseed + 3 tbsp water) instead of a regular egg, and swap the butter in the mashed potatoes for olive oil. The result is a plant‑based puff that still delivers that coveted crunch.
📦 Storage & Reheating Tips
Refrigerator Storage
Place cooled puffs in an airtight container lined with a paper towel to absorb any residual oil. They’ll stay fresh for up to 3 days. When you’re ready to enjoy them again, reheat using the method below for optimal crispness.
Freezing Instructions
Arrange the uncooked puffs on a baking sheet and freeze until solid. Transfer the frozen puffs to a zip‑top bag; they’ll keep for up to 2 months. To cook from frozen, add an extra minute or two to the frying time, ensuring they reach a golden hue throughout.
Reheating Methods
For the crispiest results, reheat in a preheated oven at 375°F (190°C) for 8‑10 minutes, turning halfway through. If you’re short on time, a quick skillet toss with a splash of oil will revive the crunch in 3‑4 minutes. The trick to reheating without drying it out? A splash of water in the pan and a quick cover for the first minute creates steam that keeps the interior moist while the exterior regains its crunch.