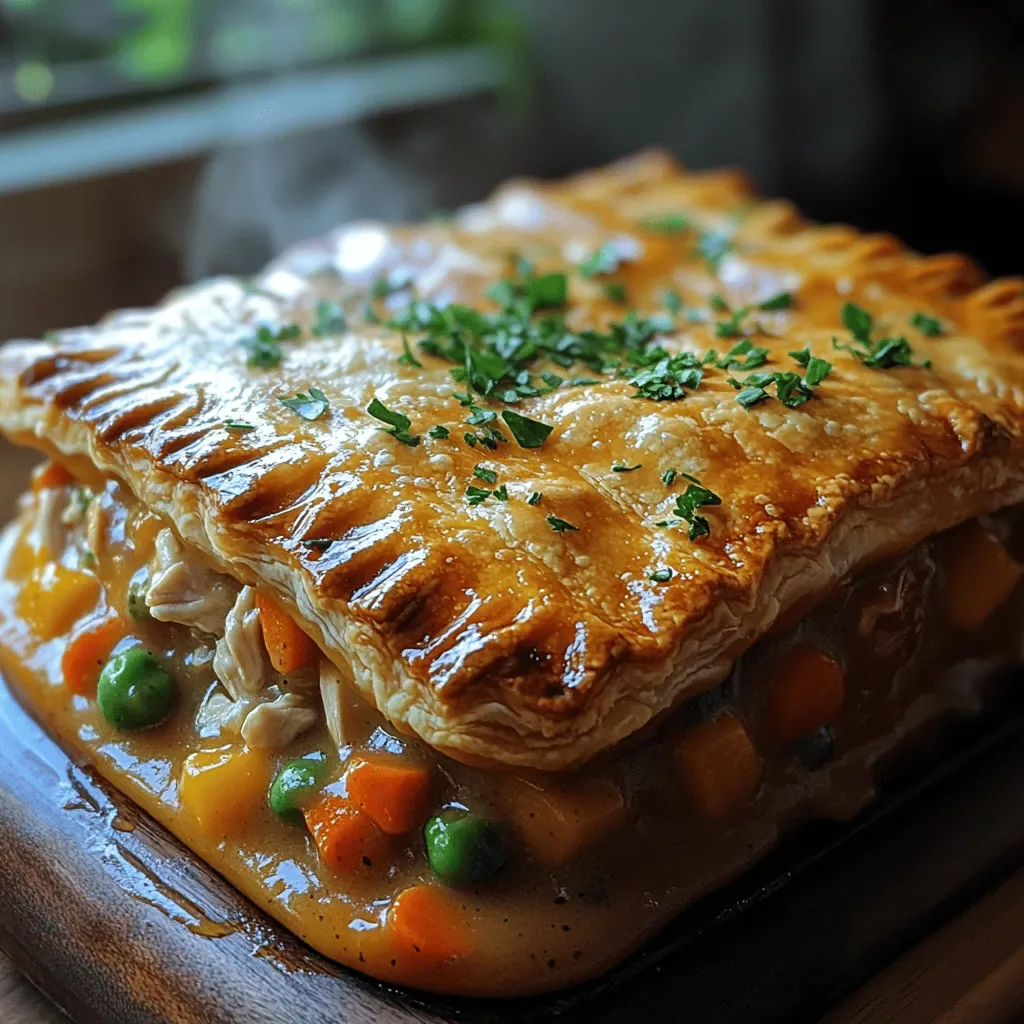
It was a crisp autumn evening when I first discovered the magic of a slow‑cooker chicken drenched in a silky, golden gravy. I was standing in my kitchen, the scent of onions caramelizing in butter wafting through the house, while the rain tapped a gentle rhythm on the windows. The moment I lifted the lid of the slow cooker, a cloud of fragrant steam rose like a warm hug, curling around my face and promising comfort in every sip. I remember the first bite—tender, juicy chicken that fell off the bone with a sigh, smothered in a gravy that clung to every morsel like a lover’s embrace. That night, my family gathered around the table, eyes wide, forks poised, and I knew I had stumbled onto a family‑favorite that needed to be shared.
What makes this dish stand out isn’t just the ease of tossing everything into a pot and letting the cooker do the work. It’s the symphony of flavors that develop over hours, the way the simple pantry staples—salt, pepper, garlic powder—transform into something richer than the sum of their parts. Imagine the deep, earthy aroma of sautéed onions mingling with the subtle sweetness of a small onion, all married to a broth that has been coaxed into a glossy, velvety gravy. The chicken, whether bone‑in or boneless, absorbs every nuance, becoming succulent and flavorful without ever drying out. And the best part? You can set it and forget it, freeing up your evening for a cozy movie night or a stroll through the fallen leaves.
But wait—there’s a secret trick that takes this gravy from good to unforgettable, and I’ll reveal it in step four of the instructions. Have you ever wondered why restaurant‑style gravies have that glossy sheen and that depth of flavor that seems impossible to replicate at home? The answer lies in a tiny, often‑overlooked ingredient that most home cooks skip. I’ll spill the beans (well, the broth) later, and trust me, you’ll want to add it the next time you make this dish. This little twist is what turns a simple weeknight dinner into a show‑stopping centerpiece.
Now that I’ve set the scene, let’s dive into the details. I’ll walk you through every step, from selecting the perfect chicken pieces to mastering the gravy’s silky texture. Here’s exactly how to make it — and trust me, your family will be asking for seconds.
🌟 Why This Recipe Works
- Flavor Depth: The slow cooker allows the chicken to bathe in its own juices, while the broth and aromatics meld together over hours, creating layers of flavor that a quick stovetop sauté could never achieve.
- Texture Perfection: Low, steady heat breaks down connective tissue, making bone‑in pieces melt‑in‑your‑mouth tender, yet the meat retains enough bite to stay satisfying.
- Effortless Simplicity: With just a handful of pantry staples, you can set the timer and walk away, freeing up precious time for other chores or a well‑earned break.
- Time Efficiency: While the cooker does the heavy lifting, you can prep side dishes, set the table, or simply relax—no constant stirring required.
- Versatility: The base gravy can be adapted with herbs, spices, or even a splash of wine, making it a perfect companion for mashed potatoes, rice, or buttery noodles.
- Nutrition Boost: Using bone‑in chicken adds collagen and minerals to the broth, while the modest amount of butter or oil keeps the dish heart‑healthy.
- Ingredient Quality: Each component—fresh garlic, crisp onion, quality broth—shines through, proving that simple ingredients can create gourmet results.
- Crowd‑Pleaser Factor: The comforting aroma and rich, savory gravy appeal to all ages, making it a go‑to for family gatherings, potlucks, or a cozy night in.
🥗 Ingredients Breakdown
The Foundation
The backbone of this dish is the chicken itself. Whether you choose bone‑in thighs, drumsticks, or boneless breasts, each offers a different texture and flavor profile. Bone‑in pieces release marrow and collagen, enriching the gravy with a silky mouthfeel, while boneless cuts cook faster and are easier to portion. If you’re aiming for maximum flavor, I recommend using a mix of both; the bones add depth, and the meat stays juicy. When shopping, look for chicken with a bright pink hue and firm flesh—signs of freshness that will translate into a better final product.
Aromatics & Spices
A small onion, finely chopped, provides a subtle sweetness that balances the savory broth. Garlic cloves, minced or smashed, add a pungent kick that deepens as they slow‑cook. Garlic powder and onion powder amplify these flavors, ensuring every bite is consistently seasoned. Freshly ground black pepper adds a gentle heat without overwhelming the delicate gravy, while salt enhances all the other flavors. Remember, seasoning is a layering process—add a pinch now, taste later, and adjust as needed.
The Secret Weapons
One packet of instant gravy mix might sound like a shortcut, but it’s actually the secret weapon that gives this dish its body and glossy finish. The mix contains starches and seasonings that thicken the broth quickly, turning a thin stock into a luxurious sauce. Pair it with a cup of chicken broth for depth, and you have a gravy that’s both rich and velvety. If you’re feeling adventurous, swap the packet for a homemade roux—just a tablespoon of butter and flour cooked together—but the packet guarantees consistency for busy weeknights.
Finishing Touches
A drizzle of butter or a splash of oil at the beginning helps sauté the onions and garlic, releasing their aromatics. Optional fresh herbs—like thyme, rosemary, or parsley—can be tossed in during the last 30 minutes for a burst of green freshness. These herbs not only add flavor but also a pop of color that makes the dish visually appealing. If you love a little heat, a pinch of crushed red pepper flakes can be added to the gravy for a subtle kick. The beauty of this recipe is that you can customize it to suit your palate without compromising the core comfort.
With your ingredients prepped and ready, let's get cooking. Here’s where the fun really begins...
🍳 Step-by-Step Instructions
Start by patting the chicken pieces dry with paper towels. This simple step ensures the skin (if you’re using bone‑in) gets a nice sear, which locks in juices and adds a caramelized flavor to the gravy. Heat 2–3 tablespoons of butter or oil in a skillet over medium‑high heat until shimmering. Place the chicken in the pan, skin side down, and let it brown for about 4–5 minutes—listen for that satisfying sizzle that tells you the Maillard reaction is in full swing. Flip the pieces and brown the other side for another 3 minutes, then transfer them to the slow cooker.
In the same skillet, add a little more butter if needed, then toss in the chopped onion. Cook, stirring occasionally, until the onion becomes translucent and starts to turn golden around the edges—about 3–4 minutes. Add the minced garlic and cook for an additional 30 seconds, just until fragrant. This quick sauté builds a flavor base that will infuse the entire dish as it simmers.
Sprinkle the garlic powder, onion powder, salt, and freshly ground black pepper over the sautéed onions. Stir well to coat the aromatics evenly. Then, pour in the cup of chicken broth and the packet of gravy mix, whisking until the mixture is smooth and free of lumps. This is the moment the broth transforms into a velvety sauce, ready to envelop the chicken.
Place the browned chicken back into the slow cooker, nestling the pieces among the onion‑broth mixture. If you’re using fresh herbs, tuck them in now for a subtle infusion. Cover the cooker and set it to low for 6–7 hours, or high for 3–4 hours. The low setting yields the most tender result, as the gentle heat slowly breaks down the connective tissue.
About 30 minutes before the cooking time ends, check the consistency of the gravy. If it’s thinner than you’d like, whisk in a tablespoon of cornstarch mixed with cold water, then let it cook uncovered on high for the remaining minutes. The gravy will thicken, becoming glossy and clingy—just the way restaurant gravies look.
Once the chicken is fork‑tender and the gravy has reached your desired thickness, give the whole pot a gentle stir. Taste and adjust seasoning—perhaps a pinch more salt or a dash of black pepper. If you added herbs early, you might want to remove the stems now, leaving only the leaves for a fresh finish.
Serve the chicken hot, spooning generous amounts of the rich gravy over each piece. Pair it with buttery mashed potatoes, fluffy rice, or a simple buttered noodle. The gravy will soak into the sides of the potatoes, creating a luscious coating that makes every bite unforgettable. Go ahead, take a taste — you’ll know exactly when it’s right.
And there you have it! But before you dig in, let me share some tips that will take this from great to absolutely unforgettable...
🔐 Expert Tips for Perfect Results
The Taste Test Trick
Before you seal the slow cooker, always give the broth a quick taste. This is your chance to fine‑tune the seasoning—add a pinch more salt, a dash of pepper, or a splash of soy sauce for umami depth. Trust your palate; if it tastes good now, it will taste even better after the hours of slow cooking.
Why Resting Time Matters More Than You Think
After the cooker switches off, let the chicken sit for 10 minutes with the lid on. This resting period allows the juices to redistribute, ensuring each bite is moist and flavorful. I once sliced into the chicken immediately and missed that juicy burst—now I always wait.
The Seasoning Secret Pros Won’t Tell You
A pinch of smoked paprika or a splash of Worcestershire sauce hidden in the gravy adds a subtle smoky undertone that elevates the dish without being overpowering. It’s a trick I picked up from a culinary class, and it never fails to impress even the most discerning diners.
The Crisp Finish
If you love a bit of texture, pop the cooked chicken under the broiler for 2–3 minutes after removing it from the slow cooker. The skin will crisp up, creating a delightful contrast to the tender meat and silky gravy. I tried this once for a holiday dinner, and the guests couldn’t stop raving about the crispy edges.
Herb Timing
Fresh herbs added too early can lose their bright flavor. Instead, sprinkle them in during the last 30 minutes of cooking, or even right before serving, to preserve their aromatic punch. This simple timing tweak makes the difference between a flat herb note and a vibrant finish.
The Bottom‑Line Butter Finish
Stirring a tablespoon of cold butter into the hot gravy just before serving creates an emulsified, glossy sauce that clings beautifully to the chicken and any side dish. The butter also adds a luxurious mouthfeel that makes the gravy taste restaurant‑grade.
🌈 Delicious Variations to Try
One of my favorite things about this recipe is how versatile it is. Here are some twists I've tried and loved:
Herb‑Infused Garden Delight
Add a medley of fresh thyme, rosemary, and sage during the last half hour. The herbs infuse the gravy with earthy notes, perfect for serving over roasted root vegetables. The result is a rustic, herbaceous profile that feels like a countryside feast.
Spicy Southwest Kick
Stir in a tablespoon of chipotle in adobo sauce and a pinch of cumin when you add the broth. The smoky heat pairs wonderfully with corn‑bread or a side of cilantro‑lime rice, turning a classic comfort dish into a fiesta on a plate.
Creamy Mushroom Medley
Sauté sliced cremini or shiitake mushrooms with the onions, then add them to the slow cooker. The mushrooms absorb the broth and release their own juices, creating a richer, earth‑filled gravy that’s perfect over egg noodles.
Lemon‑Garlic Brightness
A splash of fresh lemon juice and an extra clove of minced garlic added in the final 15 minutes brighten the sauce, cutting through the richness. Serve with a side of steamed asparagus for a light, citrus‑kissed dinner.
Thai‑Inspired Coconut Curry
Replace the chicken broth with coconut milk, add a tablespoon of red curry paste, and toss in sliced bell peppers. The result is a fragrant, creamy curry that brings a tropical twist to the classic gravy concept.
📦 Storage & Reheating Tips
Refrigerator Storage
Cool the chicken and gravy to room temperature within two hours, then transfer to airtight containers. Store in the fridge for up to four days. For best texture, keep the gravy separate from the chicken if you plan to reheat later; this prevents the meat from becoming soggy.
Freezing Instructions
Portion the cooked chicken and gravy into freezer‑safe bags or containers. Label with the date and freeze for up to three months. When ready to use, thaw overnight in the refrigerator, then reheat gently on the stovetop, adding a splash of broth if the sauce looks too thick.
Reheating Methods
To reheat without drying out, place the chicken and gravy in a saucepan over low heat, stirring occasionally. Add a tablespoon of water or broth if needed. For a quick microwave fix, cover the dish with a damp paper towel and heat in 30‑second bursts, stirring between intervals. The trick to reheating without drying it out? A splash of broth or a dab of butter restores moisture and shine.